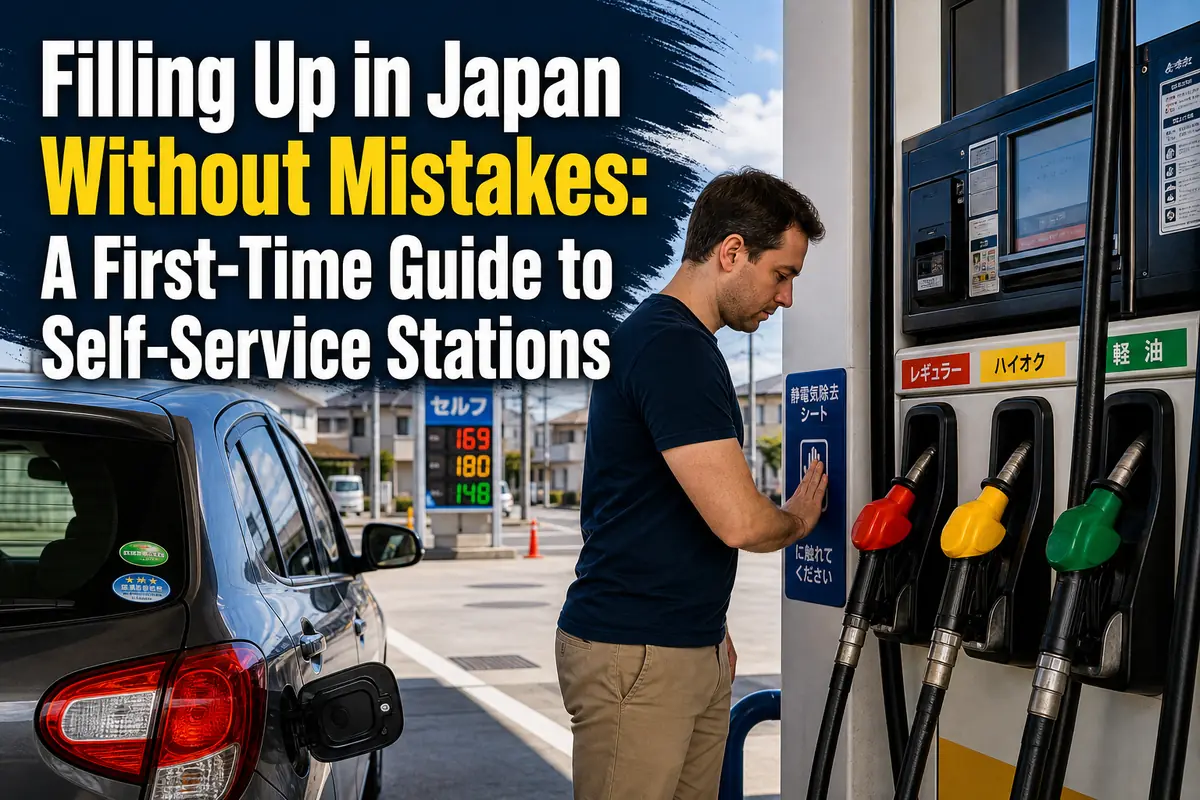
Filling Up in Japan Without Mistakes: A First-Time Guide to Self-Service Stations
At a Japanese self-service gas station, the most important step comes before touching the pump: confirm the vehicle’s fuel type. Then stop the engine, choose the matching fuel on the screen, touch the static-removal pad, insert the correct nozzle fully, and stop when the pump shuts off automatically.
This guide is for foreign residents, students, workers, and visitors driving a rental car or an unfamiliar vehicle. Pump layouts and payment methods differ by station, but the basic safety sequence is consistent across Japan.
Quick orientation
- Regular gasoline: レギュラー (regyurā), normally marked red
- Premium gasoline: ハイオク (haioku), normally marked yellow
- Diesel: 軽油 (keiyu), normally marked green
- Kerosene: 灯油 (tōyu), normally marked blue; do not put it in a car
- If you choose the wrong fuel, do not start the engine
Confirm the fuel before using the pump
The vehicle’s required fuel—not its size, color, or appearance—determines which nozzle to use.
A small car is not automatically a diesel, and the Japanese term keijidōsha (軽自動車, light motor vehicle) does not mean it uses keiyu (軽油, diesel). The similar-looking words are a known source of mistakes.
The three fuels offered for ordinary cars
Regular gasoline — レギュラー (regyurā)
This is standard unleaded gasoline. Many gasoline-powered passenger cars in Japan use it.
Premium gasoline — ハイオク (haioku)
This is high-octane gasoline. Use it when the manufacturer or rental company specifies premium fuel. Do not assume that premium is automatically better for a vehicle designed for regular gasoline.
Diesel — 軽油 (keiyu)
Diesel is only for a diesel-engine vehicle. Putting gasoline into a diesel vehicle—or diesel into a gasoline vehicle—can cause the engine to stop and may damage fuel-system parts.
At pumps where hoses or nozzles are color-coded, Japan’s designated colors are yellow for premium gasoline, red for regular gasoline, and green for diesel. Kerosene is blue. Read the written fuel name as well as checking the color, especially at an unfamiliar station.
Where to check an unfamiliar vehicle
Before entering the station, look at:
- the rental agreement or vehicle information supplied by the rental company;
- a label inside or near the fuel door;
- the owner’s manual;
- the vehicle inspection certificate or other vehicle documents; or
- instructions from the rental desk, dealership, employer, or vehicle owner.
Do not guess. If the information is unclear, call the rental company or ask station staff before paying.
Follow this sequence at the pump
The safest approach is to complete each step in order and avoid switching between the vehicle and pump once fueling has begun.
1. Enter the correct lane
Look for セルフ (serufu, self-service). A station marked フルサービス (furu sābisu, full service) has staff perform the fueling.
Park close enough for the hose to reach the fuel opening without stretching it. Check which side of the vehicle has the fuel door before stopping. If you overshoot or choose the wrong side, reposition the car rather than pulling hard on the hose.
2. Stop the engine and prepare the vehicle
Put the vehicle in Park, apply the parking brake, switch off the engine, and close the doors and windows. Smoking and open flames are prohibited.
Passengers—especially children—should remain away from the fueling area. The Fire and Disaster Management Agency’s safety guidance says one person should carry out the fueling operation.
3. Choose the payment method and fuel
Screens commonly ask for some combination of:
- payment method: 支払方法 (shiharai hōhō);
- fuel type: 油種 (yushu);
- amount in yen: 金額指定 (kingaku shitei);
- number of liters: 数量指定 (sūryō shitei); or
- full tank: 満タン (mantan).
Some machines offer an English-language button, often labeled “English” or 英語 (eigo). If not, use the Japanese terms above and follow the pictures and illuminated prompts.
Check the selected fuel name one more time on the confirmation screen. A wrong selection at this stage is much easier to correct than fuel already inside the tank.
4. Touch the static-removal pad
Before opening the fuel cap, firmly touch the marked 静電気除去シート (seidenki jokyo shīto, static-removal pad) with your bare hand.
If there is no pad, official fire-safety guidance says to touch a metal part of the vehicle to discharge static electricity. Do this before opening the cap because gasoline vapor may be present around the fuel opening.
ここがポイント: Confirm the fuel, stop the engine, and discharge static electricity before opening the cap. These are safety steps, not optional screen instructions.
5. Open the cap and select the matching nozzle
Open the outer fuel door and remove the cap. Place the cap in its holder if the vehicle has one; do not put it where dirt can collect on it.
Take the nozzle whose written label matches the fuel selected on the screen. Check both pieces of information:
- the screen says the intended fuel; and
- the nozzle label says the same fuel.
If they do not match, return the nozzle and call an attendant.
6. Insert the nozzle fully and fuel
Insert the nozzle well into the filler neck. Confirm that the meter has reset, then pull the lever firmly.
At some stations there may be a short pause before fuel flows. Self-service pumps are monitored and controlled for safety, so a delay does not necessarily mean the machine is broken. Keep the nozzle in place and follow the screen or audio instructions.
When the nozzle clicks and the flow stops automatically, release the lever. Do not continue topping up after the automatic stop. Extra fuel can spill or overflow.
7. Finish before moving the car
Return the nozzle securely to its holder. Replace and tighten the fuel cap, close the outer door, and collect the receipt and any change.
Before starting the engine, check that:
- the nozzle is back on the pump;
- the fuel cap is fitted;
- the fuel door is closed;
- no warning remains on the screen; and
- the receipt or payment card has been collected.
Payment is the part that varies most
There is no single payment setup used by every self-service station in Japan. Even stations under the same brand may have different equipment and accepted methods.
Common options include:
- cash;
- a credit card;
- a station-issued prepaid card;
- a membership key, app, or QR service; and
- selected electronic-money services.
Do not assume that a card or mobile payment accepted at one location will work at another. Check the signs at the entrance or pump before committing to a lane.
Cash payment
A cash machine may take payment at the pump before fueling. Depending on the station, unused money may be returned by the pump, by a separate change machine, or at a counter.
Watch for these words:
- 現金 (genkin): cash
- おつり (otsuri): change
- 精算機 (seisanki): payment or change machine
- レシート (reshīto): receipt
Keep any printed slip until you have received the change. If the screen directs you to another machine, take the slip with you.
Credit cards and mobile payments
Insert, swipe, tap, or scan only when prompted. A foreign-issued card may fail even when the station accepts the same card brand, so carrying enough cash for an alternative payment is sensible when driving outside major urban areas or late at night.
Mobile and QR payment support is station-specific. For example, an operator may advertise a payment service only at participating locations. Confirm the individual station rather than relying only on the brand logo.
Prices and discounts
Fuel prices are normally displayed in yen per liter. The amount may differ by location, payment method, membership status, and the station operator’s pricing policy.
Some signs show several prices, such as a general price and a member or app price. Read the conditions before assuming the lowest number applies to you. A discount that requires registration, a domestic app account, or a particular payment product may not be available to a short-term visitor.
Rental cars require two extra checks
With a rental car, the two practical questions are which fuel to use and how the car must be returned.
Confirm the fuel at pickup
Ask the rental desk to point out the required fuel and the fuel-door release. Take a photo of the fuel instruction if it is printed on the key tag, agreement, or dashboard notice.
This matters because unfamiliar vehicles are a common setting for misfueling. Do not rely on the body style or the fact that the car is a hybrid; a hybrid vehicle still uses the fuel specified by its manufacturer and rental company.
Check the return condition
Many rentals are supplied with a full tank and must be returned full, but the exact settlement method depends on the company, vehicle, and plan. Some rental operators also offer mileage- or consumption-based settlement for eligible vehicles.
Before returning the car:
- read the fuel-return condition in the agreement;
- refuel near the return location if a full tank is required;
- keep the receipt as proof of where and when you fueled; and
- allow time to find another station if your preferred payment method is rejected.
A receipt may also help the rental company confirm that the correct fuel was purchased if a question arises.
Safety rules that do not change by region
Payment equipment varies, but the core fire-safety rules apply across Japan.
- Stop the engine before fueling.
- Do not smoke or use any flame.
- Touch the static-removal pad before opening the cap.
- Keep children and other passengers away from the nozzle area.
- Let one person complete the operation.
- Use only the fuel specified for the vehicle.
- Do not force more fuel in after the automatic stop.
- Follow station signs and staff instructions.
Self-service pumps are intended for fueling vehicles. Customers must not use a self-service automotive nozzle to fill a portable container with gasoline. If fuel is needed for equipment or an approved container, speak to station staff and follow the applicable rules; do not improvise at the pump.
What to do when something goes wrong
The first safe action is usually to stop, leave the engine off, and contact the attendant.
You selected the wrong fuel but have not started pumping
Return the nozzle without fueling. Cancel the transaction if the screen allows it, or use the call button.
Useful terms include:
- 係員呼出 (kakariin yobidashi): call attendant
- 取消 (torikeshi): cancel
- 中止 (chūshi): stop or discontinue
You put in the wrong fuel
Do not start the engine. If it is already running, stop it as soon as this can be done safely. Tell the station attendant, rental company or vehicle owner, and roadside-assistance provider exactly what was added and approximately how much.
JAF advises that replacing the fuel before starting the engine is the basic response. Driving can circulate the wrong fuel and turn a draining job into more serious damage.
Fuel spills or overflows
Release the lever immediately, keep the engine off, and alert staff using the call button. Do not try to wash the spill away or start the vehicle. Keep other people away and follow staff instructions.
The pump does not begin fueling
Check the screen before moving anything. The machine may still be processing payment or waiting for authorization. Make sure the nozzle is inserted fully and the display is telling you to begin.
If it still does not work, return the nozzle and call staff. Do not repeatedly squeeze the lever, switch nozzles, or move the car while holding the hose.
Regional and operator differences to expect
The fuel names and essential safety sequence are stable, but the customer experience changes from one station to another.
Possible differences include:
- whether English guidance is available;
- which cards, apps, or electronic money are accepted;
- where cash change is collected;
- whether the station is open 24 hours;
- whether attendants are easy to reach at night;
- whether a full-service lane is available; and
- how member and nonmember prices are displayed.
Rural areas may have fewer late-night options, while busy urban stations can have narrow entrances or short waiting lanes. Search for a station before the fuel level becomes critical, particularly when returning a rental car on a deadline.
What changed in 2026
A February 2026 amendment to Japan’s fire-safety regulations made it possible for qualifying self-service stations to introduce conditional automated control systems, often described as AI-assisted fueling monitoring.
This does not remove the driver’s responsibilities. You must still choose the correct fuel, stop the engine, discharge static electricity, handle the nozzle safely, and follow all displayed instructions. The change concerns how compliant stations monitor and authorize fueling operations behind the scenes.
For a customer, the visible effect may be limited. There may still be a brief wait before fuel begins flowing, and an attendant or monitoring system can stop the operation when unsafe behavior is detected. Equipment will not be identical at every station because adoption depends on the operator and facility.
Common mistakes to avoid
Most first-time problems can be prevented with a short pause before payment.
- Do not confuse keiyu (diesel) with keijidōsha (a light motor vehicle).
- Do not choose fuel by nozzle color alone; read the label.
- Do not open the cap before touching the static-removal pad.
- Do not assume every pump accepts the same foreign card or mobile wallet.
- Do not leave without collecting cash change from a separate machine.
- Do not top up after the nozzle stops automatically.
- Do not start the engine after misfueling.
- Do not discard a rental-car fuel receipt before completing the return.
A practical check before every fill-up
Use the same five-point check even after self-service fueling becomes familiar:
- Confirm the required fuel from the vehicle or rental documents.
- Stop the engine and read the pump’s payment instructions.
- Match the screen selection, written fuel label, and nozzle.
- Touch the static-removal pad before opening the cap.
- After fueling, replace the nozzle and cap before starting the car.
The next time you borrow or rent a different vehicle, start again with step one. Familiarity with the station does not tell you what fuel an unfamiliar car needs.
参照リンク
- Fire and Disaster Management Agency: Precautions for self-service fueling (PDF)
- Fire and Disaster Management Agency: Static-electricity measures at self-service stations
- Fire and Disaster Management Agency: 2026 materials on AI use at self-service stations (PDF)
- ENEOS: How to use a self-service station
- ENEOS: Service-station FAQ
- JAF: What happens when the wrong fuel is used
- Toyota Rent a Car: Fuel rules when returning a vehicle