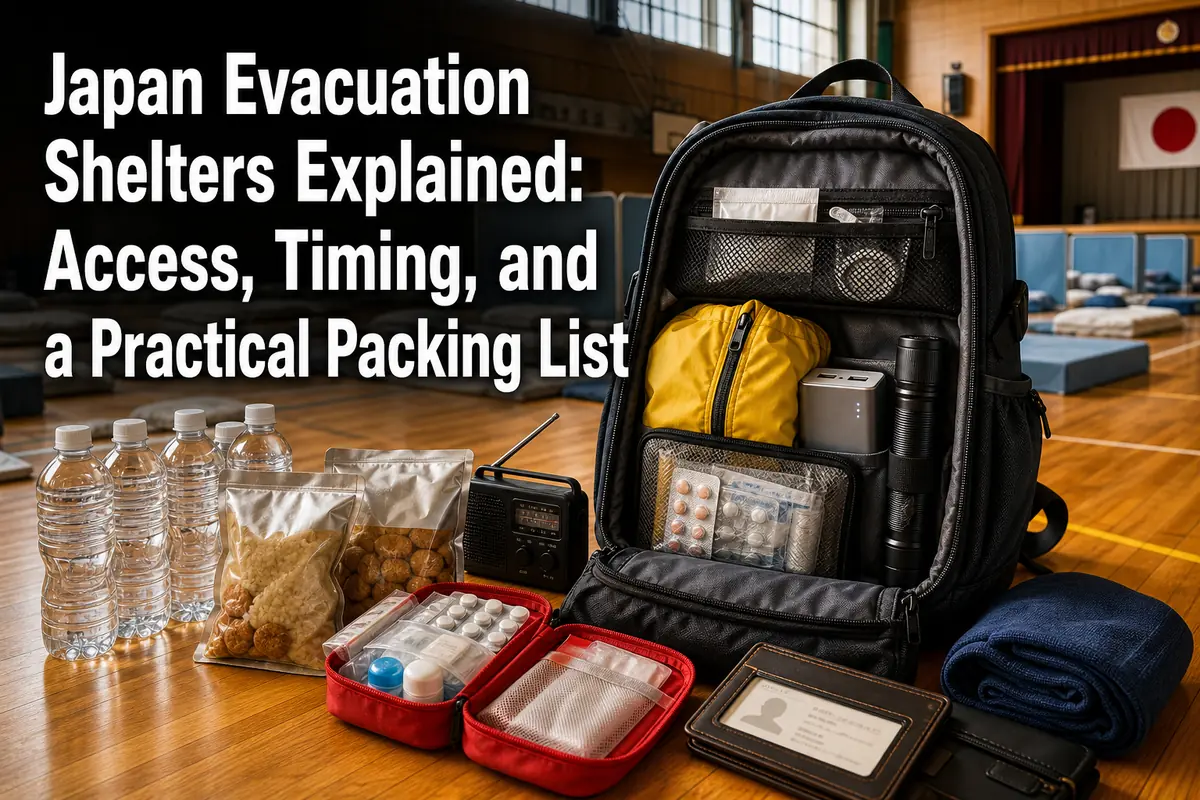
Japan Evacuation Shelters Explained: Access, Timing, and a Practical Packing List
Foreign residents and visitors can use public evacuation shelters in Japan. They are free, and Japanese nationality is not required. Go when your home or current location is unsafe and your municipality has opened the shelter. Do not delay an urgent evacuation because you cannot find identification or finish packing.
The important catch is that not every marked facility opens for every emergency. A building suitable after an earthquake may be unsafe during a flood or tsunami. Check your municipality’s current instructions before traveling when it is safe to do so.
Quick answer
- Public shelters are available to foreign residents and visitors as well as Japanese citizens.
- No reservation or admission fee is normally required, but staff will ask you to register after arrival.
- Bring water, food, medicine, identification, phone power, and personal necessities if time allows.
- Confirm that the shelter is open and suitable for the specific hazard.
- Pet areas, accessible facilities, medical support, and available supplies differ by municipality and shelter.
This guide is for foreign residents, international families, students, workers, and travelers who may need somewhere safe during an earthquake, flood, landslide, typhoon, tsunami, or major fire. The information is current as of August 1, 2026, but local instructions during the actual emergency take priority.
First understand the two places called “shelter”
A place that saves you from immediate danger and a building where you stay afterward are not always the same. Confusing them can send you toward the wrong location.
Designated Emergency Evacuation Site
A shitei kinkyū hinan basho (指定緊急避難場所) is a place for escaping an immediate threat to life. A municipality designates sites separately for hazards such as:
- Flooding
- Landslides
- Earthquakes
- Tsunamis
- Large fires
The hazard type matters. A riverside school may be appropriate after an earthquake but unsuitable during a flood. A tsunami evacuation building may offer immediate vertical evacuation without serving as an overnight shelter.
Designated Evacuation Shelter
A shitei hinanjo (指定避難所) is a facility where affected people can stay until the danger passes or when they cannot return home. Schools, community centers, and public halls commonly serve this role.
One facility can have both functions, but never assume that it does. Look at your municipal hazard map and the symbols beside each location.
ここがポイント: Escape the hazard first. The nearest familiar school is not automatically the correct destination for a flood, landslide, tsunami, or fire.
Who can use a public evacuation shelter?
Foreign nationality, limited Japanese ability, or tourist status does not by itself prevent you from using a public shelter. CLAIR, the Council of Local Authorities for International Relations, states that evacuation shelters are free and available to foreigners.
People who may need a shelter include:
- Residents whose homes are damaged or unsafe
- People ordered or advised to leave a dangerous area
- Travelers and commuters stranded away from safe accommodation
- Families who cannot safely remain at home because utilities, fire, flooding, or structural damage create a serious risk
- People who need additional support and are directed to an appropriate general or welfare shelter
You do not need to wait until your building collapses. If local authorities issue an evacuation instruction for your area, act before the route becomes dangerous.
Does your address decide which shelter you may enter?
Municipalities often assign neighborhoods to particular shelters so they can plan capacity and supplies. Follow that assignment when practical.
During an immediate threat, however, protecting life comes first. Go to a suitable open site that you can reach safely and explain your circumstances to staff. Shelter teams may redirect people when a facility is full, closed, outside the affected area, or unsuitable for the hazard.
Do you need a residence card or passport?
Shelter staff normally record information such as your name, address, household members, health needs, and emergency contact. Identification makes this faster, so bring a residence card, passport, driver’s license, health insurance information, or a photo or copy if readily available.
Missing documents should not stop an urgent evacuation. Tell staff what information you can provide. Keep essential documents protected in a waterproof pouch, but never return to an unsafe building to retrieve them.
Are shelters free?
Public evacuation shelters do not normally charge an admission fee. Basic emergency support may be provided, but the quantity, timing, and type of supplies depend on local conditions.
A hotel that is independently operating as commercial accommodation is different. Hotels or inns used officially as secondary shelters may have separate eligibility and assignment procedures set by the municipality. Do not book a room and assume the cost will automatically be covered.
When should you leave—and when may staying home be safer?
Evacuation means moving away from danger, not automatically going to a crowded public building. If your home is outside the risk area, structurally safe, and usable, sheltering at home may be the safer and more comfortable choice.
Possible safe destinations include:
- An open public evacuation site or shelter
- A safe upper floor or sturdy nearby building when travel is already dangerous
- A relative’s or friend’s home outside the hazard area
- Your own home when it remains safe
Do not remain at home merely because packing is inconvenient. Fire, tsunami, landslide, flood, collapse, or an official evacuation instruction can make leaving necessary.
How Japan’s alert levels affect your decision
For heavy rain and related hazards, Japan uses a five-level framework. Municipal evacuation instructions and Japan Meteorological Agency risk information serve different roles, so check both.
- Alert Level 3: Older people, people with disabilities, and others who need more time should leave dangerous areas. Other residents should prepare and may need to start early.
- Alert Level 4: Everyone in a dangerous area should evacuate. Complete evacuation before conditions worsen.
- Alert Level 5: A life-threatening disaster may already be occurring. Take the safest action immediately; traveling to a distant shelter may no longer be possible.
The JMA’s English terminology for weather risk information was updated in 2026. Its multilingual service now displays labels such as “Level 4 Urgent Warning” and “Level 5 Emergency Warning.” These describe risk information equivalent to alert levels; the local municipality issues evacuation instructions.
Check whether the shelter is actually open
A location printed on a map is not proof that it is open today. Municipalities decide which facilities to open according to the hazard, affected area, building condition, capacity, and available staff.
Before leaving, check as many of these sources as conditions allow:
- Your city or ward disaster website
- Municipal emergency email, app, or official social media account
- Emergency alerts on your phone
- Local television or radio
- The JMA multilingual weather warning service
- Announcements from police, firefighters, or municipal staff
If communications fail and remaining where you are is clearly dangerous, move toward the nearest suitable safe place. Do not wait for perfect information while water rises or a tsunami warning is active.
What to bring: a realistic shelter bag
Pack first for the needs that a shared shelter cannot easily replace. Emergency stocks may be delayed, limited, or unsuitable for your health, diet, child, or pet.
Keep the bag light enough to carry safely. A practical target is one backpack per capable adult rather than a heavy suitcase.
Essential items
- Drinking water
- Ready-to-eat food that requires little or no cooking
- Regular medicine and a copy of prescriptions or medicine details
- Smartphone, charging cable, and charged power bank
- Flashlight or headlamp with spare batteries
- Portable radio if available
- Identification and emergency contact details
- Cash in small notes and coins
- Masks, hand sanitizer, tissues, and wet wipes
- Small first-aid kit
- Warm layer, rain protection, and a change of underwear
- Towel, plastic bags, and indoor shoes or slippers
Items for sleep, sanitation, and privacy
A school gym floor can be hard, bright, noisy, and shared by many people. Space may be limited.
Useful additions include:
- Compact sleeping bag or blanket
- Lightweight mat
- Eye mask and earplugs
- Toilet paper and portable toilet bags
- Menstrual products
- Toothbrush and other personal hygiene items
- A small cloth or foldable screen for privacy, if practical
Personal information card
Write down essential information in English and, if possible, Japanese:
- Full name and date of birth
- Japanese address
- Emergency contact
- Medical conditions
- Medicine names and doses
- Allergies and dietary restrictions
- Preferred language
- Contact details for your embassy or consulate when relevant
CLAIR provides multilingual evacuation registration cards that can communicate injuries, allergies, and other needs using Japanese translations and images. Saving or printing one in advance can reduce misunderstandings when staff are busy.
Pack for the people in your household
A standard emergency list is only the starting point. Babies, older adults, disabled people, and people with medical or dietary needs may depend on items that a shelter cannot supply immediately.
Babies and children
Consider bringing:
- Formula, feeding supplies, baby food, and drinking water
- Diapers, wipes, disposal bags, and a change of clothes
- Child medicine and health records
- A familiar small toy, book, or comfort item
- Identification and contact information attached securely to the child’s belongings
Medicine, disability, and care needs
Bring the equipment and information you normally rely on:
- Several days of essential medicine when possible
- Prescription records or a medication notebook
- Spare glasses, hearing-aid batteries, or mobility-device accessories
- Charging equipment for powered medical or communication devices
- Incontinence and personal-care supplies
- Written instructions explaining the help you need
Tell shelter staff about urgent needs during registration. A general shelter may have an accessible area, but its equipment and staffing can be limited.
A fukushi hinanjo (福祉避難所), or welfare evacuation shelter, is intended for people who need special support that an ordinary shelter cannot adequately provide. Access procedures vary. Some municipalities direct people there after assessment at a general shelter, while others designate eligible users and routes in advance. Ask your municipality before a disaster if your household may need this option.
Food allergies, religious diets, and medical diets
Do not assume distributed meals will meet every requirement. Bring clearly labeled food you can safely eat and show staff a written allergy or dietary card.
Explain whether the issue is:
- A life-threatening allergy
- A medical restriction
- A religious requirement
- A personal preference
That distinction helps staff understand the risk. CLAIR’s multilingual materials include food-allergy pictograms designed for evacuation settings.
What happens after you arrive?
Expect registration, a shared space, and instructions that may change as more information becomes available. Shelter operations are local, and evacuees may help with daily tasks when they are able.
A typical arrival process is:
- Confirm that the facility is open and enter through the instructed area.
- Register your household with shelter staff.
- Report injuries, pregnancy, disability, medicine needs, allergies, or communication difficulties immediately.
- Move to the assigned space rather than choosing a room yourself.
- Learn the locations of toilets, water, information boards, medical support, and emergency exits.
- Follow announcements about meals, waste, quiet hours, charging, hygiene, and possible relocation.
You may be asked to help distribute supplies, clean shared areas, organize waste, or translate. Participation depends on your health, safety, caregiving duties, and ability. Ask what you can do rather than guessing.
If you do not speak Japanese
Start with short phrases and show written information:
- Hinanjo wa koko desu ka? — Is this the evacuation shelter?
- Eigo wa hanasemasu ka? — Can anyone speak English?
- Kusuri ga hitsuyō desu. — I need medicine.
- Arerugī ga arimasu. — I have an allergy.
- Tasukete kudasai. — Please help me.
Use a translation app if the network is working, but keep important sentences saved offline. Pointing to a multilingual registration card may be faster than typing during a busy arrival.
Pets require a separate plan
“Evacuate with your pet” does not necessarily mean the animal may stay beside you inside the main sleeping area. Japan’s Ministry of the Environment promotes preparing to evacuate together, but each municipality and shelter controls the actual arrangement.
Possible arrangements include outdoor cages, a separate room, a designated animal area, or referral to another facility. Assistance dogs are treated differently from pets, but owners should still notify staff about their needs.
Prepare:
- Carrier, cage, leash, and secure harness
- Pet food and water
- Medicine
- Toilet supplies and waste bags
- Vaccination and ownership records
- A photo of you with the animal
- Identification tag and microchip details
Check your municipality’s pet policy now. During an emergency, tell staff about the animal before entering shared areas.
Common mistakes that create avoidable risk
Most shelter problems begin before arrival: choosing the wrong destination, leaving too late, or expecting supplies to cover every need.
Avoid these errors:
- Going to the closest school without checking the hazard type
- Assuming every listed shelter opens automatically
- Waiting for Alert Level 5 before acting
- Taking a car when flooding, congestion, road damage, or local rules make driving dangerous
- Carrying so much luggage that evacuation becomes slow
- Forgetting medicine, prescription information, glasses, or charging equipment
- Expecting shelter meals to fit allergies or religious diets
- Bringing a pet without a carrier or restraint
- Entering a closed or damaged facility
- Leaving a safe home when officials recommend sheltering in place
The correct action can differ between two neighboring municipalities. Shelter names, opening rules, neighborhood assignments, pet arrangements, and welfare-shelter procedures are local decisions.
A 15-minute preparation you can do today
The most useful preparation is to connect your address to the correct hazard-specific destination. A generic nationwide shelter search is not enough.
Complete these steps for every place where your household regularly spends time:
- Open the municipality’s hazard map.
- Mark the sites for earthquake, flood, landslide, tsunami, and major fire as relevant.
- Check which locations are emergency evacuation sites and which are overnight shelters.
- Save the municipality’s shelter-opening page on every adult’s phone.
- Walk one safe route and identify an alternative.
- Ask about pet and accessibility arrangements.
- Prepare a light bag and review it at least twice a year.
- Agree on a family meeting point and an out-of-area contact.
Take screenshots or keep a paper copy. A map that requires a working mobile connection may be unavailable when you need it most.
Final checklist before leaving
When an evacuation becomes necessary, keep the decision simple:
- Is the place where I am still safe for this hazard?
- What has the municipality instructed people in my area to do?
- Is my planned site open and appropriate for this disaster?
- Can I reach it without crossing a river, slope, damaged road, or other danger?
- Do I have medicine, phone power, identification, water, and essential household items?
- Have I told someone where I am going, if communications are available?
If danger is immediate, leave with what you can carry and protect life first. Registration, missing documents, and forgotten nonessential items can be handled after you reach safety. The practical next step is to check your municipality’s map today—not during the warning—and write down one correct destination for each hazard that affects your neighborhood.
参照リンク
- Cabinet Office: Designated Emergency Evacuation Sites and Designated Evacuation Shelters
- Cabinet Office: Multilingual Evacuation Information
- Cabinet Office: Disaster Preparedness for Foreign Residents
- Japan Meteorological Agency: Weather Warnings and Alert Levels
- CLAIR: Seek Refuge at an Evacuation Shelter
- CLAIR: Multilingual Disaster Preparedness Materials
- Ministry of the Environment: Disaster Preparedness for People and Pets
- Yokohama City: Preparing for Disasters